Showing posts with label learn. Show all posts

Thursday, April 9, 2009

Ceviche


Taken from "Salud con Sabor (Health with Flavor): Healthy and Flavorful Latino Recipes and Helpful Tips", a cookbook my classmate and I created for our communications class.
Ceviche (every 1lb of seafood serves about 4)
2 lbs of firm, fresh red snapper fillets, cut into 1/2 inch pieces, completely deboned (or other seafood)
1/2 cup of fresh squeezed lime juice
1/2 cup of fresh squeezed lemon juice
1/2 purple onion, finely diced
1 cup of fresh peeled, seeded, and chopped tomatoes
1 serrano chili, seeded and finely diced (we used habanero)
2 teaspoons of salt
dash of ground oregano
dash of Tabasco or a few grains of cayenne pepper
Garnishes:
Cilantro
Avocado
Tortillas or tortilla chips


Preparation
1. In a non-reactive casserole dish, either Pyrex or ceramic, place the fish, onion, tomatoes, serrano chile, salt, tabasco, and oregano.
2. Cover with lime and lemon juices.
3. Let sit covered in the refrigerator for an hour, then stir, making sure more of the fish gets exposed to the acidic lime and lemon juices.
4. Let sit for several more hours, giving time for flavors to blend.
5. Serve with tortilla chips and garnish of choice.

This versatile ceviche is fresh and easy with no cooking involved!

Makes 4 servings (every lb of seafood will feed 4 people)

Prep time: 10 minutes

Nutrition Profile:
Low Calorie ♦ Low Carb ♦ Low Sodium ♦ Low Cholesterol ♦ Low Saturated fat ♦ Heart Healthy ♦ High Potassium

As you can see from the picture, we forgot the green stuff. This was one of the recipes from the healthy eating cookbook that Rachel and I made for a class project. Jerry actually helped us make this. It was delicious! Hopefully we'll make it again in the future. When we completed the cookbook we kind of swore off making Mexican food for a while. :) It's been a handful of months though, so maybe we're ready to introduce it back to the kitchen. Eventually. In the meantime, I have other recipes from the cookbook to come.


Friday, August 1, 2008

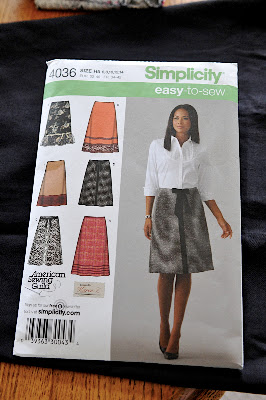
Skirt Sewing

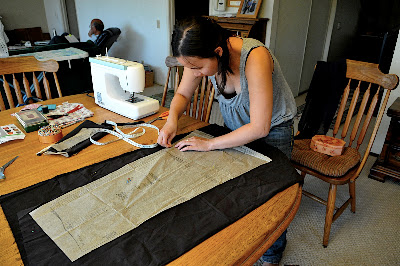
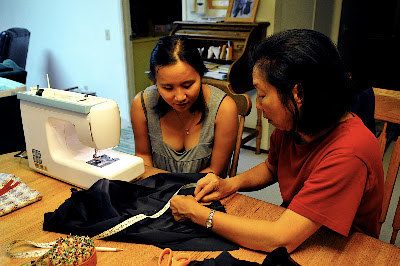
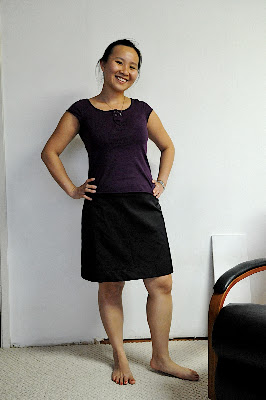
I've had my sewing machine for a while but I've been limiting myself to really simple sewing projects that involved only straight lines and the regular foot/buttonholer foot, haha. I decided it was about time I learned some more technical things so when we headed up north last month, she taught me some really useful stuff. I had a ton of fabric that my cousin gave me, so we decided to make me a skirt.

I learned how to read a pattern, it's quite easy once you know how to decipher it. Except sewing pattern sizes are waaaaaaay off. I usually wear a 4 or 6...but according to the pattern I was a 14?! Errrr? The skirt was also waaaaay too long, meaning it was made for someone who was 5'8 or something.

Yeah, that is pretty long, haha.
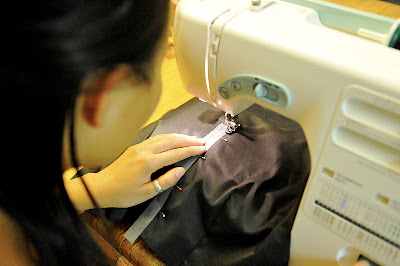
I really wanted to learn how to put in a zipper using the zipper foot so she taught me a neat trick using tape. But we used the wrong kind...if you ever use tape, use shiny not matte.

I also learned how to measure properly.

Yay, finished product!

Looks simple huh? It fits really well and is very comfy. If I had more time I would love to make more clothes b/c it fits my body better and you can choose the fabric you want. I think the next thing I want to tackle is a shift dress. I found a pattern in my newest Ready Made mag so I think I'll adapt it somehow.

Tuesday, July 29, 2008

Knitting

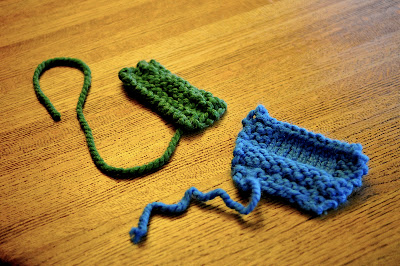
Jerry's mom taught me how to knit during our weekend up there. She teaches sewing and knitting classes at Joanns, so I tagged along and attended her Knitting 101 class. There were 5 of us that day so we got plenty of 1-on-1 attention. His mom's a really patient teacher. We pretty much all sucked at the beginning but after she would show us for the zillionth time, we'd finally get it. Although afterwards she told me one of the girls still really needed more help, haha.

Ok, so the blue one was my first one, I started off all messy but it looks better in the later rows, yeah?? The green one was my second attempt and as you can tell, I started off much more evenly. We learned how to purl also. I found purling to be much easier. Knitting is hard on your fingers overall though (for me, even harder than crocheting). So in addition to Wii wrist, I also got Knitting fingers that weekend. But yay, another thing off my list. I can still cross it off even though I kind of forgot already, right?!

Sunday, July 27, 2008

Rockband and Wii

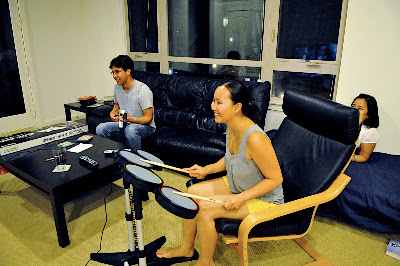
Having known that I've always had horrible hand and eye coordination when it came to video games (who else manages to go backwards in Super Mario Cart?), I also found out when playing Rockband for the first time that I had horrible hand-eye-feet coordination as well.

Jer's roommate Peter has Rockband so one night when Kim came over for belated bday pizza, we busted it out and I played for the first time. Sigh, I needed a lot of saving at the beginning. Jerry would lose trying to save me, haha. But I was not entirely hopeless! We managed to finish a Garbage song and "When We Were Young" by The Killers. I look so awkward playing though, but at least I didn't suck at the end as much as I did at the beginning. I don't think I'm ever meant to be good at vid games. But it sure is fun to try!

I also got to play Wii for the first time and finally, I don't suck (as bad) at a video game!! It turns out that I am a pretty decent pitcher (I almost struck out the side before Jer's friend's toddler turned off the TV by mistake) and if I set up all the way to the right, I am a good bowler. Haha. Fun times. We played all the games: boxing, tennis, golf, baseball, bowling and it was really fun except I got Wii wrist. :( Oh well, at least I can cross something off my list!

Friday, July 11, 2008

Learning My Way Around the Garage


Something that I don't know much about is tools, so when Jerry decided to work on some shelving for the garage I asked if I could help. My prior experiences with tools had been limited to smacking things with hammers and using wrenches to pull things off, and the occasional use of the screwdriver to well, unscrew stuff. At first I was really hesitant to use any of the big tools b/c I thought I'd be clumsy and saw off my finger or something ridiculous like that (sometimes my imagination is overactive). But after Jer coached me through each tool, I got more comfortable.
Man, tools are pretty fun! I learned how to use the drill, the miter saw, belt sander, and the circular saw (but I dubbed it the butter saw b/c it seriously cuts through wood like butter!).
My favorite tool though would have to be the miter saw b/c it's self standing and so easy to use! The butter saw is kinda heavy and awkward to use (thank goodness for the laser!), and the belt sander was too heavy for me. The drill is kinda boring. It's like an automatic screwdriver. With umm, more power.

I loved the miter saw so much I broke it.

Whoops see where I accidentally broke it? Hehe. Jer wasn't mad at all, he thought it was quite funny that I managed to break a tool like that. Luckily, Sears offers a year long warranty, so we got a brand new saw right away.

It's fun to be crafty!

Monday, July 7, 2008

Learning How To Not Drown

A quick background on my swimming lessons past:
My mom tried to teach me how to float in Hawaii when I was 13.
Nancy K tried to teach me how to breathe under water at Sunset Rec during second year.
Hannah, Trinh, and Jason and other Hawai'i folks tried to teach me in 2005. In the ocean! The big big open ocean.
But I never learned. I decided once and for all, I won't fail like I did the other 3 times!

So, over the holiday wknd Jerry gave me a swimming lesson. During that one hour, I learned how to bob my head in and out of water (I did it 9 times in a row!), how to breathe through my nose (I still need to do it slower and be more controlled though), how to position my arms to glide (I need to keep them straightened!), and how to kick my legs (whoops, I always forget and bend my knees). But I didn't get a chance to learn how to be less scared! For some reason I am still hesitant to allow myself to fully be comfortable in the water. Or maybe it's because I can't multi task (breathing, arms, kicking) so when I forget one thing, I end up freaking out in the water and wildly trying to grab Jer's arm even though the water is only 4 feet deep. While water goes up my nose, ouch! Yeah, I know!! I am such a freak-out in the water. There was this one time this toddler laughed at me in the pool! And then Christina said, I bet if dogs could laugh they'd laugh at you too! Mean! Hrmph. I do look pretty silly though. Jer says I look so stressed before I am about to breathe under water. I did my lesson sans contacts so I'm not worried about losing a contact or anything. I was excited about hitting the pool again today but I have a visit from Aunt Flo so I guess it will have to wait. Haha, all you girls know what I'm talking about.

In the meantime, any tips on how to quell my freak-outs and get more comfy in the water? What were some of your swimming experiences?

Monday, May 19, 2008

My Very First Sewing Project


I decided that it was time I tried a real project instead of just running some fabric back and forth at random, haha. So I googled "easy coin purse" and splityarn's awesome tutorial came up.
As a novice, this was a very simple pattern for me- easy to follow and nothing fancy. As you can tell from the collage I pretty much followed her instructions to the T. But instead of a snap enclosure I did a button one (since my Kenmore has that nifty option). Word to the wise: read the manual carefully! Careless me used the buttonHOLER to try to sew the button...but duh of course I ended up cracking and breaking the button! Jer told me to read the guide more carefully so then I finally figure out how to make buttonholes. I was too tired to figure out how to use the button option so I did it by hand. Next time I would probably use more durable material too. This material was a bit thin but I love the pattern/contrast!

I think I need to do some more easy projects before I move to the harder patterns in my queue. Any suggestions, people?

Wednesday, May 14, 2008

Soft Pretzels


I was super craving soft pretzels so we finally attempted to make it. We used this recipe from Food Network. We made some slight modifications, but overall pretty much followed the same steps. Except before poaching we didn't really let it sit for 15 min...b/c I was impatient, haha.
1. Yeast is cool!
2. Trying to mix flour into the dough intermittently with the dough hook resulted in the dough trying to escape over the edge of the bowl (like a dough ghost trying to escape the bowl!). Hmm, any tips on how to keep this from happening?
3. Rolling is fun! Except...we've eaten sooo many pretzels in our life...but had no idea how they twist, haha. Enter "google image".
4. I dunno what the purpose of poaching is? With baking soda?
5. Don't use wax paper!! Even if you butter it! The pretzels stuck to the paper and we couldn't eat the yummy crust which is often the best part, boo. In some cases we just ate the paper b/c picking them out took too long.
6. Don't drizzle honey before you bake...it doesn't really absorb the honey and instead it leaves a burnt bottom where the honey hits the pan. Maybe next time I incorporate honey into some of the batch.
7. Rub unmelted butter onto pretzels as soon as they cool a bit out of the oven. Tasty!
8. Don't over salt...I couldn't really see where I was salting so I was a bit liberal with the first batch. I also think sea salt is better...the crystals are bigger. Kosher salt is a bit on the small side and it doesn't flake off the pretzel as easily. Unfortunately we bought a ginormous box of kosher salt so no switching over to sea salt for a while, haha.
9. Don't attempt this recipe during dinner time. The pretzels become your dinner. 6 pretzels for dinner = not a good idea.
10. They only taste better fresh. They were just okay the next day. Next time I will halve the recipe...We tend to immediately overeat everything we make...so if we make less...we won't have that problem! (I know there is a thing called self control, but we don't have it apparently.)
11. They tasted good! Just like Costco. =)
12. It's fun trying something new.

Monday, May 12, 2008

Sewing Machine

Can I just say, my new sewing machine is DOPE?

Btw, it is so awesome to have a mechanical engineer around. It took a while, but we finally figured out how to thread the machine! Yay for new toys!

Pictures to come a bit later!
Projects to come...way later. I need to learn how to thread the bobbin on my own first, haha. You know how I like collecting things? Now I want thread in all PRETTY DIFFERENT COLORS WEEEEEEE.

Can't wait to play with it this weekend! Screw school!

Saturday, February 2, 2008

Kimchi Making Party!


Kimchi is one of my favorite foods, so it was inevitable that we'd try to learn how to make it!
Evil sista got the recipe from her momma. However, it involved numerous steps, so no detailed instructions in this entry.

Quarter cabbages partially and then pull them apart.

Salt the cabbages with A LOT of salt to extract the water.

FYI- great exfoliator. Our hands were so soft.

Let soak for 3-6 hours. Watch dvds (Hyobin and Jenta). Nap (Cheryl). Try to study (me).

Slice and then julienne the radish.

Add red pepper powder.


And the green onions. Ewww.

Add some kind of sugar, fish sauce, another kind of sauce, and ginger powder.

Add pureed onions and garlic.

Also add a mixture of hot water/sticky rice powder.

Mix until it becomes red and goopy.

Mix and mix and mix with the rinsed, drained, and then chopped cabbages.

Done! We are going to leave 'em out to sour for a couple days.

Haha, don't we look like oompa loompas?
Some tips:
Have plenty of counter/work space
Wear old t shirts
Work in a well ventilated area (the onions/garlic puree were STRONG!)
Have on hand plenty of containers to store made kim chi
Have some cooked rice on hand to eat immediately! And cut seaweed!

Saturday, November 10, 2007

Spam Musubi


Spam musubi is one of my favorite foods of all time. But I only like it once in a great while...otherwise I get sick of it!
Best places for spam musubi
1. 7-11 in Hawai'i (I also like the portuguese sausage and egg!)
2. Bruddahs in Gardena
3. My kitchen

Seaweed made for sushi, musubi mold, mirin (Japanese cooking wine), furikake (Japanese dry condiment) sushi rice, and spam

Simmer the spam in the mirin (let the mirin boil down at low heat, then add spam). A little bit of mirin goes a long way.

Cook rice and then put in mold over saran wrap

Sprinkle furikake

Add spam and press down

Toast seaweed in pan

Remove mold and add seaweed

Wrap and remove saran wrap

It was kind of hard and awkward to do it this way, so we got smart and put the seaweed down first

This way was definitely easier!

They disappeared pretty fast. :)
We used one container of spam and cut it into 10 slices. We used 5 sheets of seaweed and I made around 3 cups of rice. It worked out perfectly!

Sunday, August 26, 2007

Pong!


Ann finally taught me how to play mahjong! I've seen her family play dozens of times but they are so fast that it's hard to pick it up. So Ann sat me down and taught me everything. It's really complicated so I won't bother explaining. But it's a little like gin rummy or that Filipino game I learned at work. I think it's called tong-it.

Mixing tiles: this part was fun at first but it got really noisy

Look I won!!! (Finally...we played a zillion rounds until I finally won)

My awesome teacher